|
It’s the night before October 1st and I can’t wait any longer! Time to decorate for Halloween!! Heading home from work I picked up a hot apple caramel cider and I am all set to be in full Halloween mode! With our new fireplace I had to change things up a little bit, but it came out better than ever before. I used black web lace I bought at the craft store years ago and cut along the webbing to cut in half. The other half was used for my kitchen window. I bought lots of fun pumpkins last year that I started to decorate and sadly never got to finish, but they still worked perfectly. After putting all of the cute decorations with the pumpkins, I placed a large plastic cauldron that I use every year as our candy dish in the fireplace. Looks like this witch is cooking up something fun at this house!
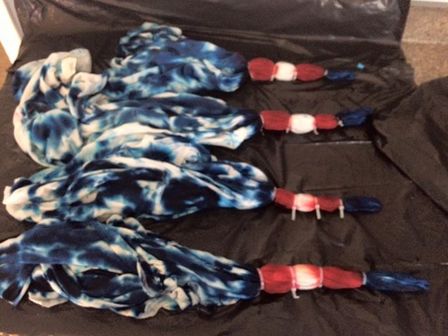
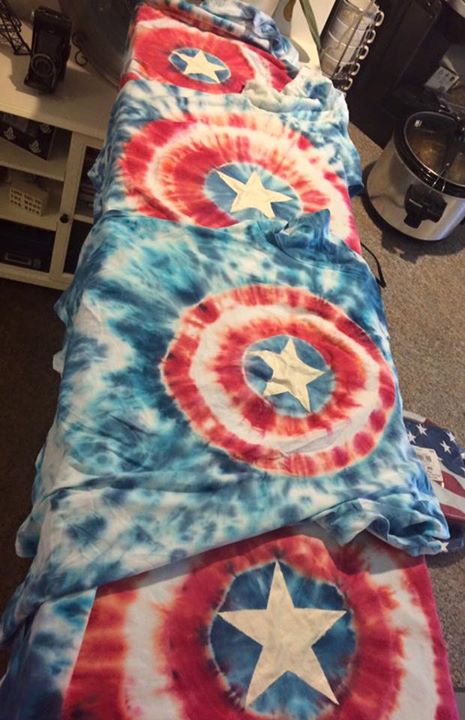
Something that Amber and I started a few years ago was creating Fourth of July shirts for our annual barbeque. Last year we tried the classic way of doing tied dyed shirts, but they looked more like purple and pink instead of blue and white. Thankfully the guys didn’t mind the colors and were willing to let us try tie dying again this year. Last month when I was at Target getting the birthday bag for memory board I found some tie dying kits on sale and picked a few up. Each kit came with three bottles filled navy, turquoise, and red dye and all I needed to do was add water, seemed easy enough! I did a little research on the best way to tie dye and decided on what pattern we wanted. This year, since we are nerdy after all, decided to make Captain American tie dye shirts. The most important part of this design was the shield so we needed to make sure the colors didn’t bleed together. To get the best seal we read that we should use zip ties, who knew?! We zipped tied each shirt with four zip ties in the pattern of the shield. Next we damped each shirt since apparently wet shirts helps the dye to get to all of the areas of the shirt. We started with the red dye, following the instructions on the package and dyed only the designated red areas of the shield, once the red was finished we repeated the process with the blue. However, since the blue looked purple we mixed the blue and turquoise to get more of a royal blue color. We covered the shirts and let them seat for at least six hours like we had read to let the dye set. After the six hours, we rinsed the dye out being care to let the blue run over only the blue and the red only over the red. Once the water started to run clear, we cut off the zip ties and washed and dried in washing machine and dryer. The last step was to create the star in the center of the shirt. To do this I cut out a star in four pieces of wax paper, then taping them to shirts. I used a white fabric spray paint that was the same texture as puff paint. I sprayed each star in two small coats to prevent them from getting runny or bubbly. I waited a few hours for the stars to dry before removing the wax paper, just in time for our annual barbeque! 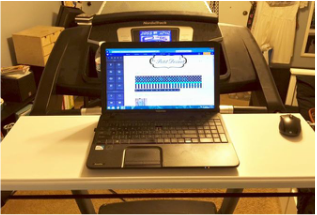 Yep, I became one of those people. I actually have wanted to do this for a while now, but not until I seen a pin on Pinterest saying it cost $20 that I decided to do it. Mostly because I wanted to see if it actually cost $20 cause I thought that was too much! And I was right! Mine only cost me $15 and a few minutes of Jack’s time. We bought a white pre-made shelf at the home improvement store, 4 eyelet screws and two heavy duty bungee cords. Jack drilled the wholes for the screw and was even nice enough to use some left over fireplace trim to put a lip on the bottom of the shelf to prevent my lab top sliding off. I leave the cords in place and just slide over my treadmill arms and off I got….very slowly! Now I have a great way to work on this site! I think this was my easiest office decor project. I found the corkboard on clearance at a craft store and I already had the gold and silver paint and round sponge brush. I poured the paint on a paper plate and lightly dipped the sponge brush into a color and dabbed it on the corkboard. I wanted to create a look that the circles were falling so I put a few circles on the top and created a drip look in the center with it pooling on the bottom of the board. Once I was finished with the gold I went onto the silver and repeated. After it was finished Jack helped me hang it on my office wall and I covered the nails with gold tacks. It is the perfect finishing touch to my new office. All of my projects and accessories were under $100…totally within our budget!
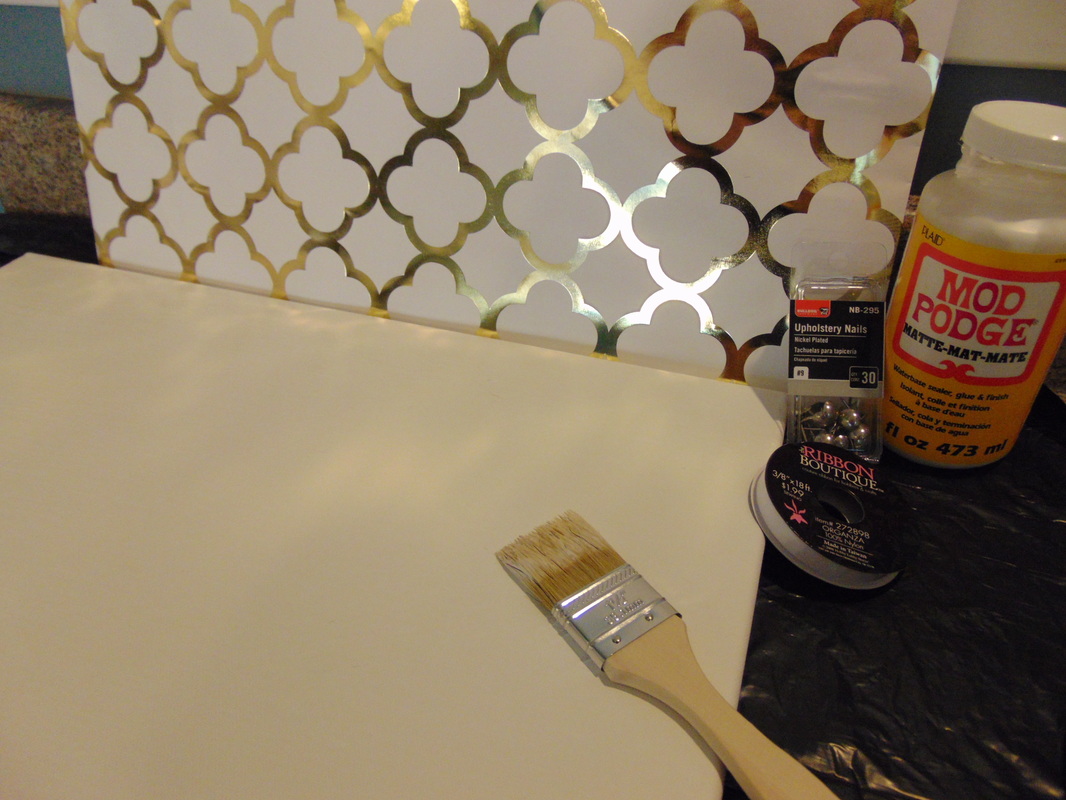
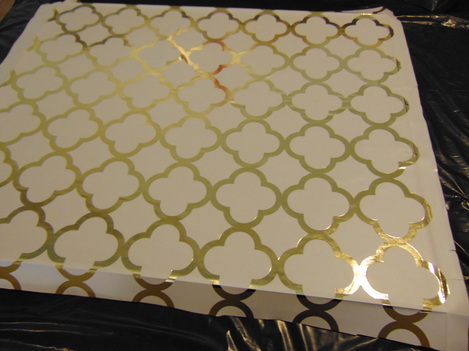
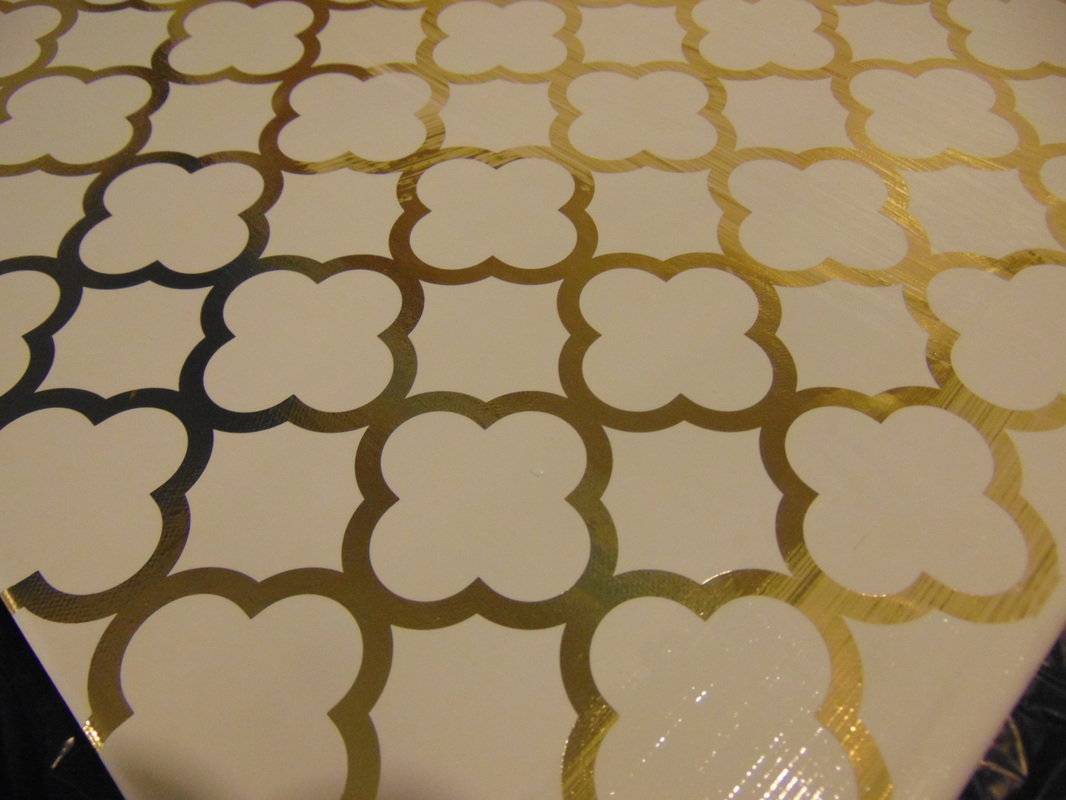
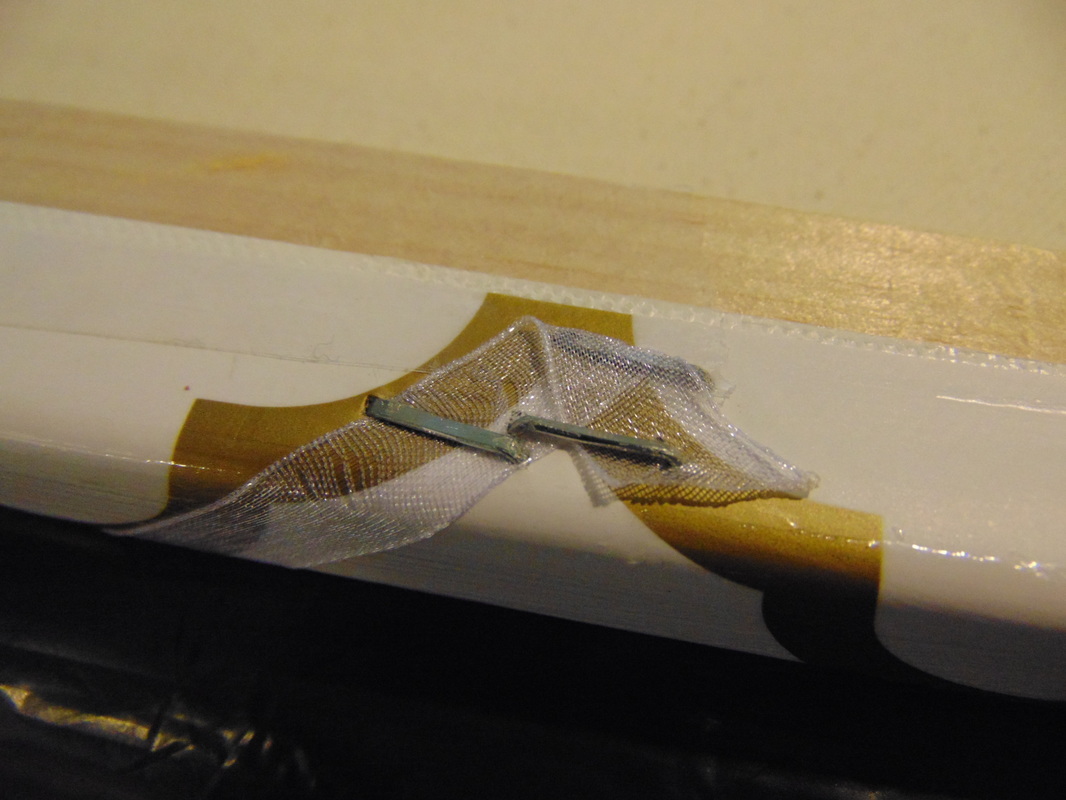
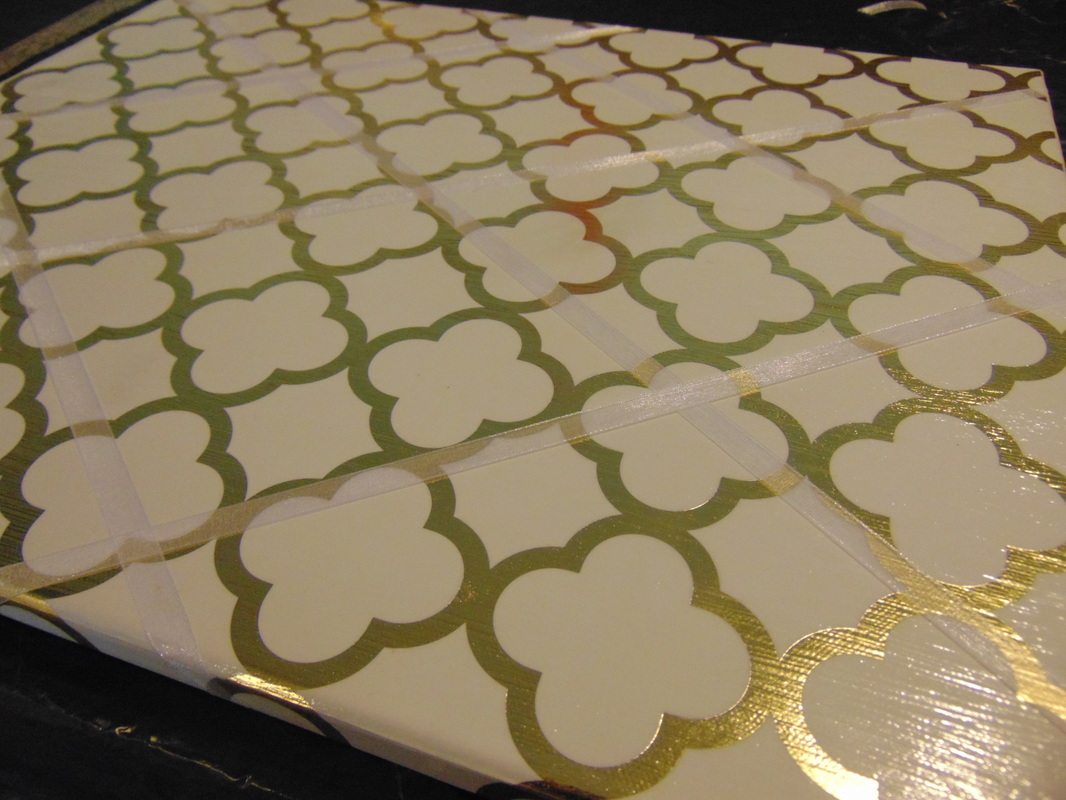
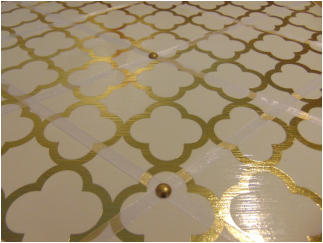
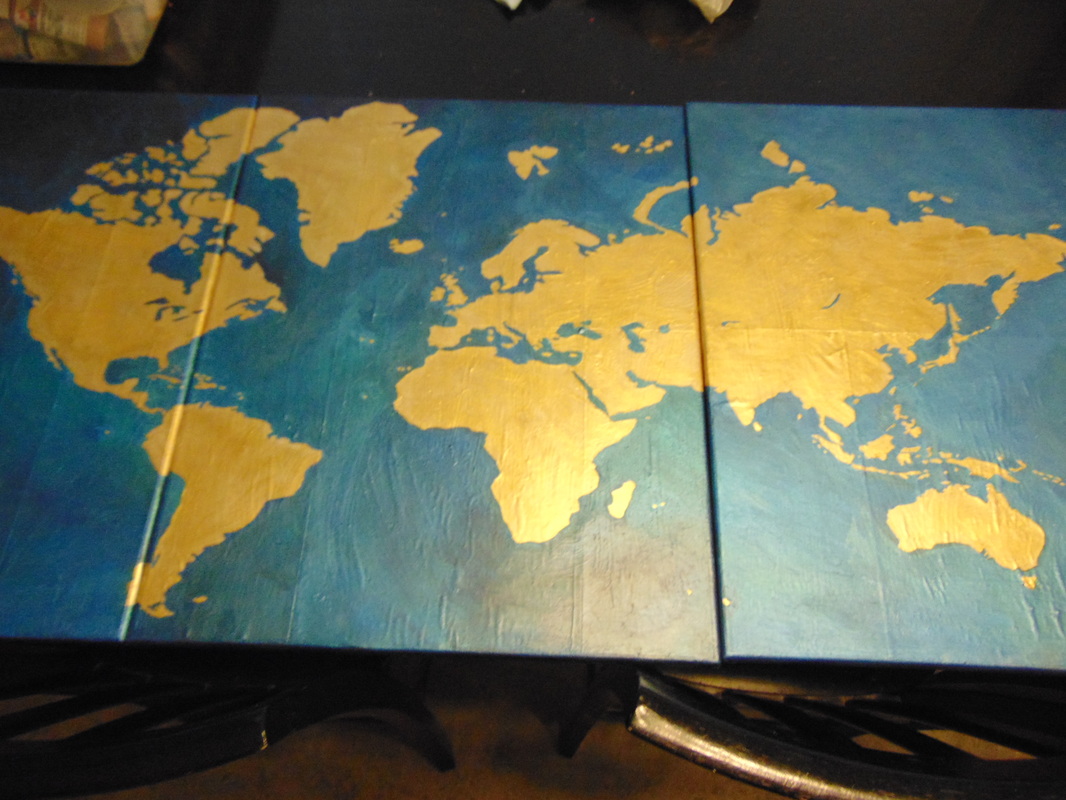
Would you believe this memory board was made from a birthday gift bag? Well it is. I knew I wouldn’t find a memory board with my color scheme within my budget and I couldn’t find fabric that I liked to make a traditional padded one. I found the birthday bag at Target and the canvas I got when I purchased the three for the world map. I cut out the needed size from the birthday bag and mod podge it to the canvas. Since it was covered paper I put a couple of layers of mod podge to protect it. Once dried I used a staple gun to attach the ribbon along the edges. Then used furniture tacks to hold the ribbon in place. I used small pieces of cardboard and hot glue to hold the tacks in place where it was only the canvas.  This is such a cool way of doing a memory board and I will be on the lookout for other cool bags or wrapping paper to make another one in the future. I can’t wait to start putting memories on it!  In my new office I have two grey chairs in front of my desk, which needed a small table to place in between them. I knew I wanted it to be metal and I wanted it to be silver to make the rest of the décor I made. I looked at several discount stores, but couldn’t find anything I liked within in my price range. On the verge of giving up I went to the furniture area of the craft store and found this bright lime green table that had a wonderful pattern, but didn’t care for the color. In the end I couldn’t pass up the $15 deal and took it home. I also bought a small square table to place between my two blue chairs in our living room. I purchased a high quality silver spray paint and got to work. I sprayed each table with a light coat of paint and waited it to try. I carefully made sure to get into all of the joints because that lime green would have been an ugly contrast to the silver. Once dry I repeated the process until I got the look I wanted. Now my co-workers have a pretty place to put their coffee or notebooks when they are in my office. Just remember not to pass up a great deal because of an ugly color and it is something that can be fixed with a can of spray paint and an afternoon of your time! I got this idea after looking up office décor ideas on Pinterest. I knew I wanted a world map, but came into the same problem as with the Yosemite picture: not within the budget. So I did the same thing as I did with that picture, I made my own. I followed the same steps as with the other one, but after I modpodge the whole picture I painted it. I got metallic blue, black and gold paints from the craft store and pulled out all of my paint brushes. I started with the gold and slowly worked my way around the edges and filling in the contanets. I had to do several layers of gold paint to get the texture I wanted, I wanted it to look just like gold leaf. Once the gold was finished I started with the oceans. I mixed white and black to create different shades of blues and repeated the process, starting with the edges and filling in. I couldn’t be more excited how these pictures came out and they look so great on my cabinets!
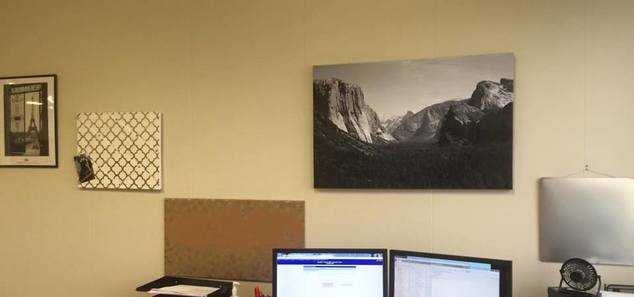
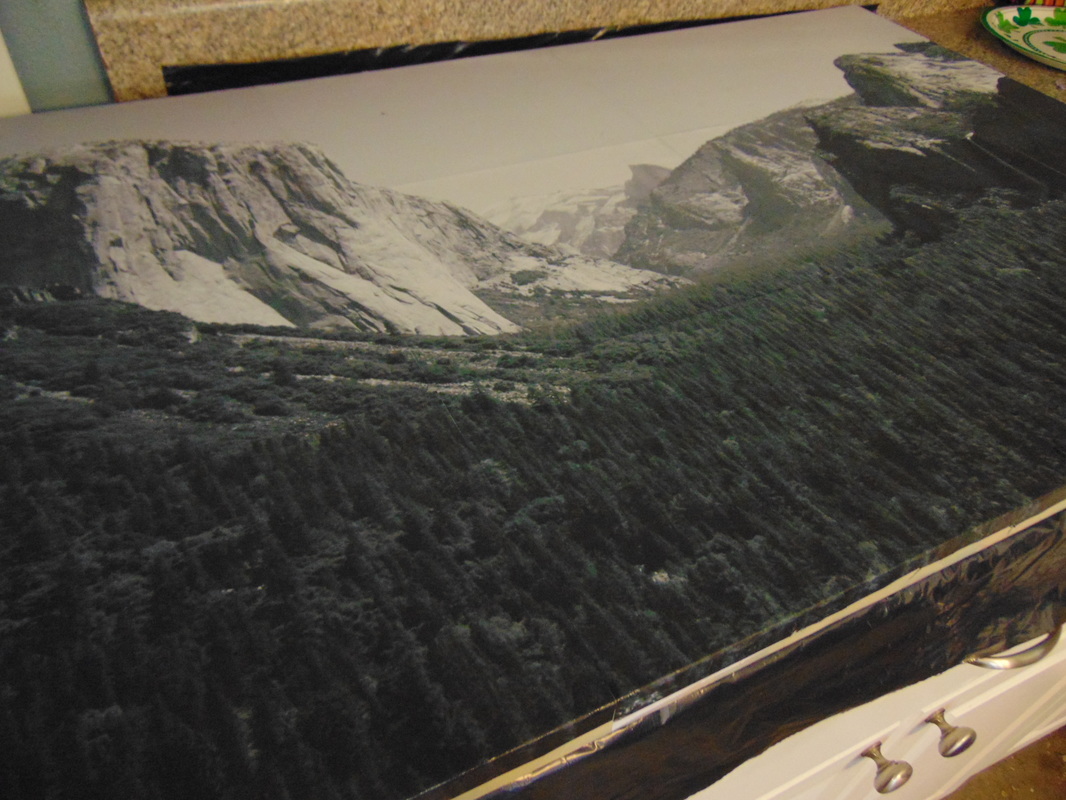
Well it's time to start decorating my NEW office! I actually wasn't expecting to get an office since I am only interiming supervising, but I am more than happy to take it! It was really sad watching my old supervisor back up the office and by the time I moved in it looked empty, boring, and depressing. I knew I was heading into a role that was going to be stressful not only because of the new requirements of me, but also because I was stepping up to a supervisor role from a team that I was an equal in. I knew the transition was going to be hard and I wanted to be able to look at something that would calm me. The one place in the world that I try to think about when I am feeling stressed is inspiration point in Yosemite. I’ve lost count how many times I have been there and it still takes my breath away. I love looking at the view and just feeling so small and whatever is causing me stress flies away. The first thing I decided to decorate my new office with was a giant picture of inspiration point, but the problem was I was on a very tight budget since we are still in the middle of our debt snowball and there are limited places that you can get large pictures cheap in town. I knew I had to make my own and I knew I wanted it fast. After looking online and a couple of stores locally I couldn’t find what I wanted to make my own canvas art so I found a large picture online that I could use. Now I don’t have the software that allows you to break a picture down to print on single sheets a paper so I resorted to something I have down in the past: Excel! I inserted the picture into an Excel spreadsheet and enlarged it to the size I needed for the canvas and printed it out. Nine pages later I was ready to start the process. The first thing I did was cut out the unprinted area on each page except the ones that was going to be on the boarder of the canvas, making sure to have it perfectly straight for easier aligning later. Since I was using a damage picture I bought for only a few dollars at the craft store, I sprayed the canvas white so none of the color would seep through. Once the canvas was try I was ready to start. I started with the top corner of the picture and brushed on some Modpodge a little bigger than the piece of paper and placed the paper in place. I then went to the next paper, brushing on more modpodge and perfectly aligning the picture next to the previous one. I repeated this process until all of the pictures formed one large one. After I cut off the access outer boarder, I put several coats of modpodge on the picture to seal it in place and project it. Once it was dry I was so excited how it turned out and no one could believe that I made it!
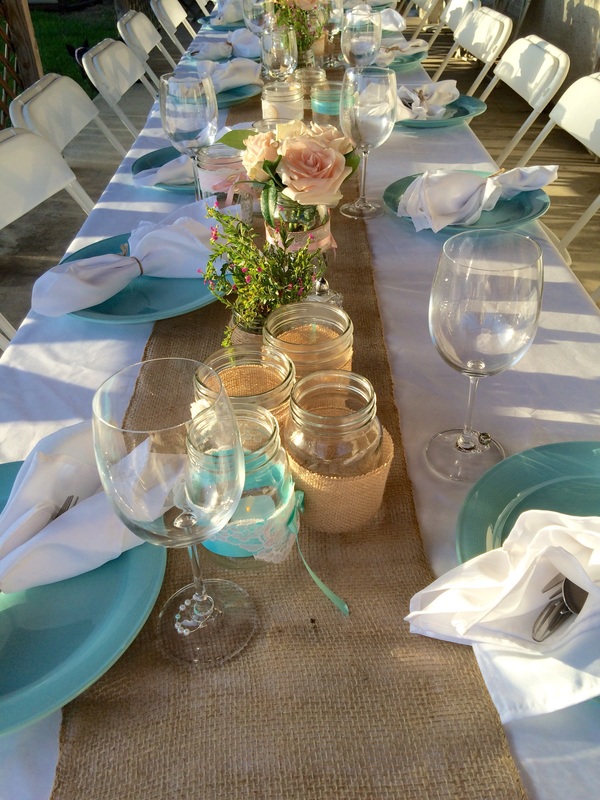
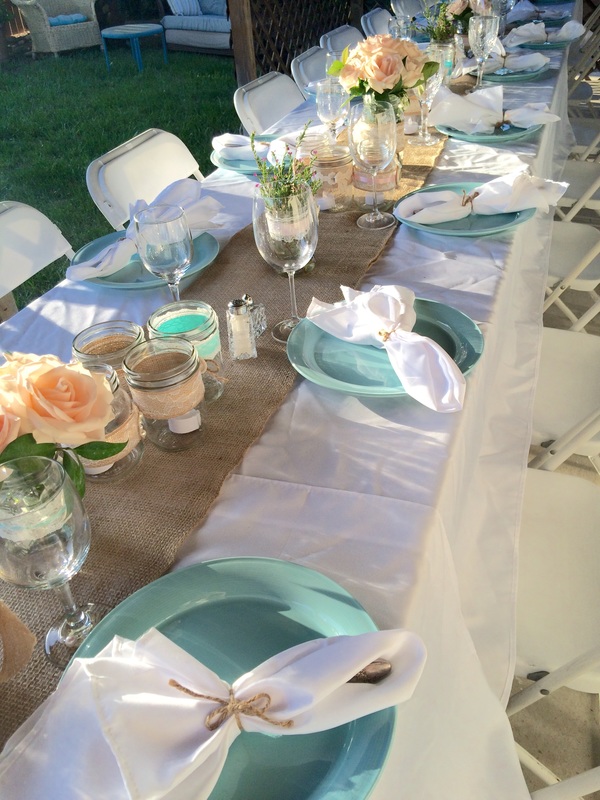
 We wanted the feeling of the marriage blessing to be carefree and classy, by picking lace, burlap, and soft blues, corals and pinks we were able to pull off a simple inspired vintage country reception. My good friend let me borrow some of her table and chairs from her rental company. I purchased longs rolls of burlap in the floral area at the craft store since it was much cheaper than in the ones in the craft area. I ordered 25 inexpensive napkins on eBay since I knew I could reuse them. I already had three long white tablecloths that I bought for Easter and my aunt saved me because she had the perfect blue plates. Between her, my mom, and myself we had enough wine glasses and silverware. I already had tons of mason jars that I use for canning so I just needed to do buy ribbon, burlap, and lace to decorate each jar. Most of the mason jars had an electric tea light and the rest had white and soft pink roses and other greenery from our courtyard. The silverware was wrapped in the white napkins and tied with twine. Jack and our friend did an amazing setting up and decorating the table while I finished getting ready. I didn't need to change a thing! I'm not afraid to admit my mom loves her dogs more than me, after all they mind better and they don't back talk! The perfect gifts for my mom always involve her dogs. Since we are still currently paying off all of our debt we have been keeping our gift cost low and reasonable. I found this cute idea on Pinterest where it was a frame that held four pictures with kids spelling out the word LOVE. Well since my mom has four dogs I thought it would be the perfect gift for her. Once day while she was at I would I went to her house with four half sized poster boards spelling out LOVE. I posed each dog and added one of the letter poster boards. After taking as many pictures as I could with each dog, I headed back home to start editing. I knew I wanted the photos to be in black and white, but since they are black dogs it took a while to get the shading and contrast to be just right. Once completed I sent them off to be printed. She was totally surprised and loved the framed pictures. Mothers are special and the original idea behind Mother's day was to acknowledge how special they are, try not to get to consumed in the commercialism of the holiday and take time to do something special and unique for your mother.
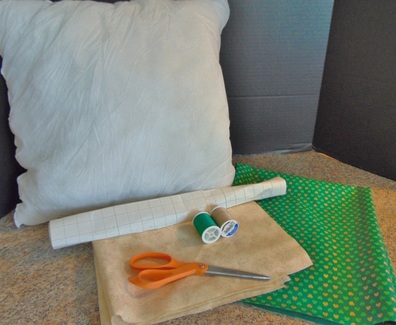
Happy Mother's Day to all of the Mothers out there!!! 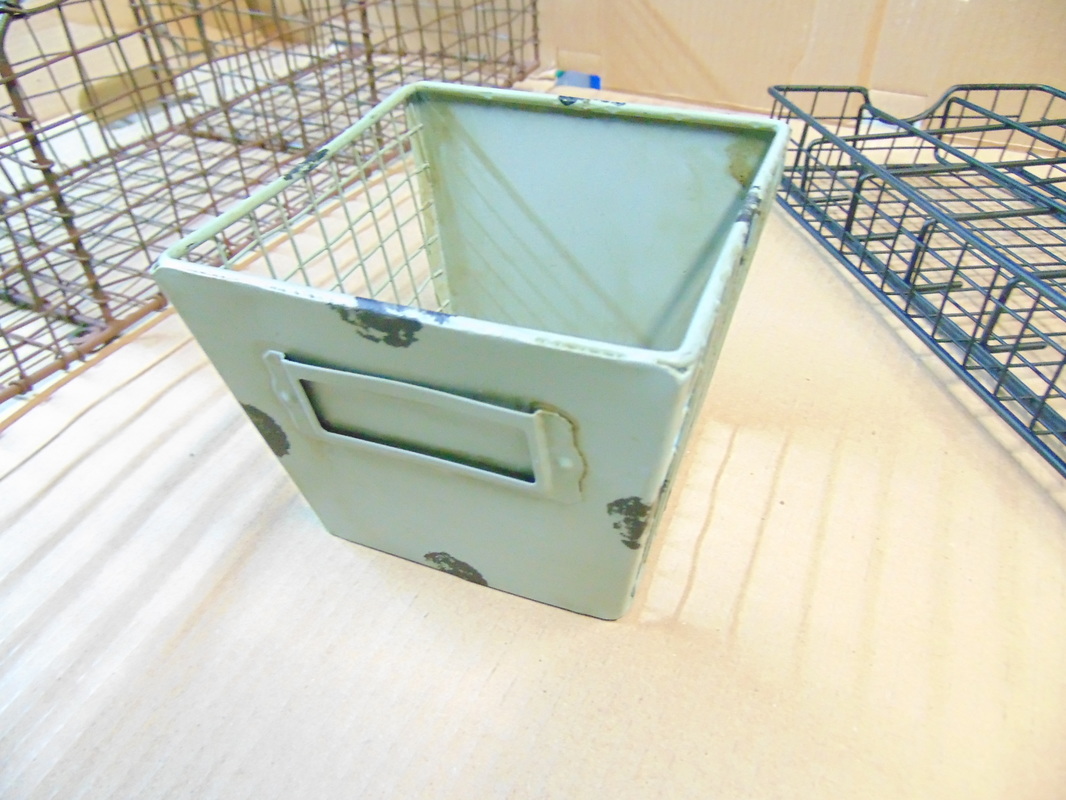 With my new kitchen cabinets I have been trying hard to keep them and my counter tops organized. For my baking and coffee area I needed to come up with something that would help keep my counter clean. I found these cute wire accessories, but hated that they didn't match, nothing a can of spray paint can't fix! After priming I lightly sprayed with silver to give more of an antique look and let them dry. Now they are a cute addition to my baking/coffee nook and tie in with my cake stand display. Just remember that if you can't find the perfect accessory you can alter it to have a one of a kind piece! 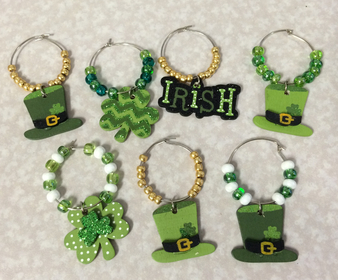 Tomorrow night is our Saint Patrick’s Day dinner party and what goes better with green than these super cute wine glass charms! These took only minutes to make and under $10. The rings are round hoop earrings found in the jewelry section of the craft store. I bought some white, shades of green and gold jewelry beads. The last thing I purchased was the little Saint Patrick's Day charms. To make I flattened out one side of the earring hoop (some come pre-crimped) and then added half of the beads. I added the charm and the remaining beads making sure to make each one different enough for someone to recognize their charm. After the last bead was on the hoop, I re-crimp the end to prevent the beads from falling off but still able to hook the two ends together easily. I'm already for the party...just need a glass of green wine! 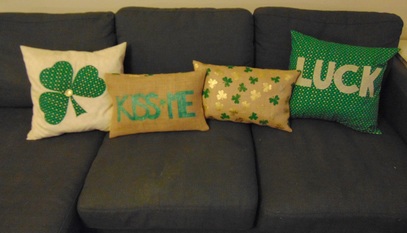 At the fabric store, I found the cutest shamrock fabric on sale and picked it up not even knowing what I was going to do with it. I didn't need another St. Patrick's Day apron or tablecloth so I decided to stick with decorating my living room and make pillows! Well actually pillow slipcovers. I decided on two different styles, two fabrics for each. I purchased 1/2 a yard of green shamrock cotton fabric and another 1/2 a yard of cream and gold cotton fabric. Lastly I purchased 1/2 a yard of fun shamrock burlap and another 1/2 a yard of plain burlap. I always keep in stock double sided iron on transfer. I measured the two cotton fabric to the 10 x 10 pillows I was going to use, leaving lots of room to overlap the fabric and room for sewing. I folded the two outer edges twice and sewed a straight line. I then centered the pillow on the fabric and folded the two sides overlapping and marked the center of the fabric. After deciding on what I want the cotton pillows to look like I cut out the letters/hearts on the transfer paper (if doing letters you will need to reverse the letters!). I put the inverted letters and hearts on the opposite cotton fabric and ironed until the glue stuck. I carefully cut out the letters/hearts and centered them on the pillow fabric and ironed in place. Once the glue cooled I sewed the letters/hearts in place. The last step I overlapped and sewed the two outer edges. For the shamrock pillow I added a gold button in the center. Super cute and super comfy! I followed the same process of sewing the longer and narrower burlap pillows, but instead of ironing on fabric I decided to paint on one of the pillows. I used regular chalk and marked out the letters, then went back with a black permanent marker and outline each letter. The last thing was to heavily paint in the letters using metallic green paint. Once the paint was dried I followed the sewing steps above.
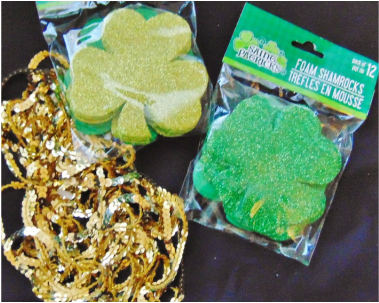
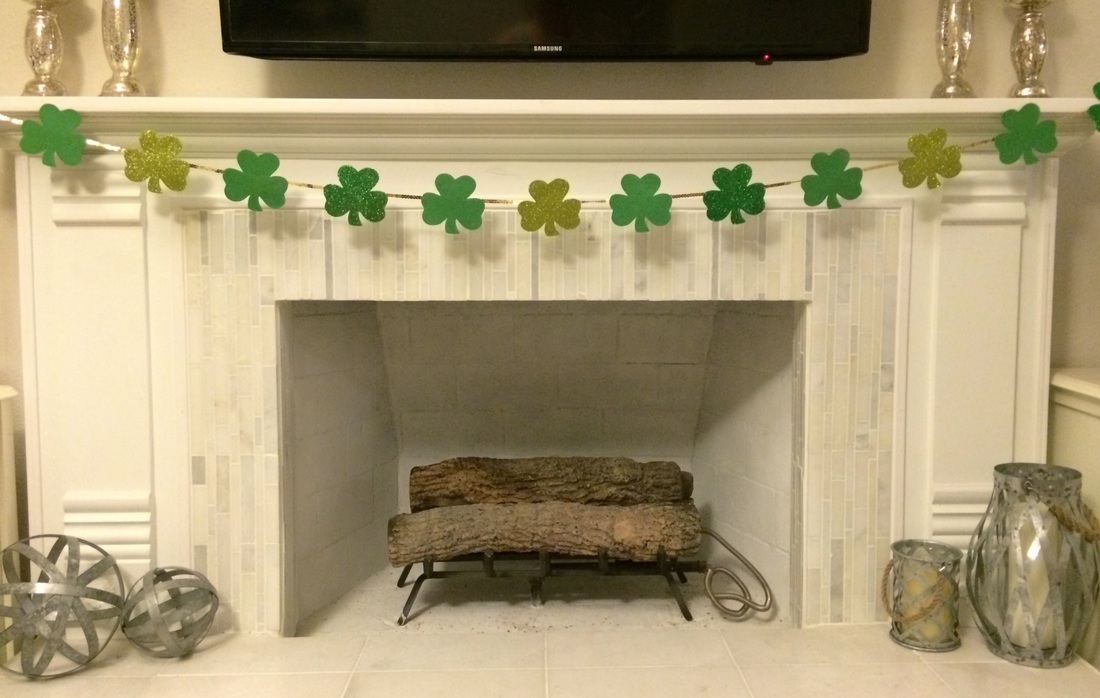
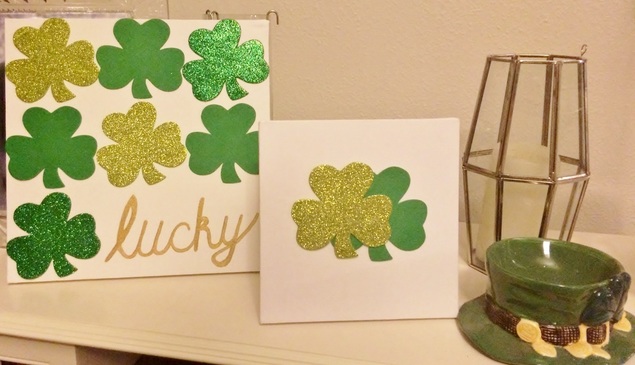
The other day I showed you how to make your own Saint Patrick Day's wreath and today I am going to show you how to make a few more decoration for under $10 and under 20 minutes. I picked up two packages of foam shamrocks and the dollar store, the canvas I got half off at the local craft store, and the string of gold sequence I already had, but can also be purchased at a craft store. For the Shamrock Garland, I used three feet of gold sequence and 13 of my foam shamrocks. I found the center of the sequence and glued the first shamrock with my hot glue gun. I then equally spaced and glued the remaining shamrocks. I love how it looks again my new white fireplace! For the artwork I left the canvas white and glued each shamrock in a fun pattern. For the larger canvas (9" by 9") I painted "lucky" with metallic gold paint and that was it. I had my house all decorated less than 20 minutes! I suggest looking through your craft project scraps and seeing what you can find at the dollar store to make your own decor!
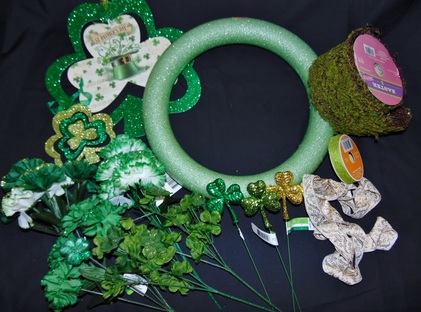
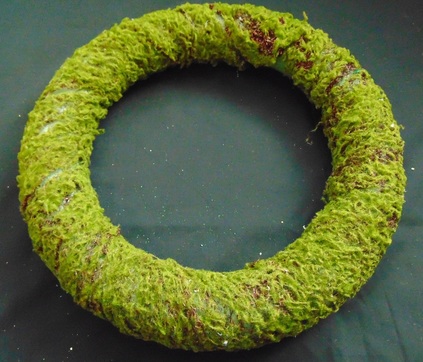
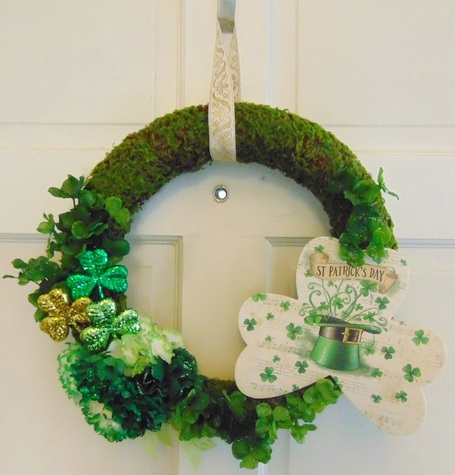
Because I can't pass up a good dinner party, I am having all my friends and family all over for a bowl of Corned Beef Cabbage and a glass of green wine! In order to prepare I felt my house needed a little Irish flare and I wasn't having much luck finding decorations that fit my style so I decide to make my own. Shocker, right? I found a green foam wreath at the local craft store and also picked up some floral, small decorations, ribbon and moss. I wrapped the foam wreath with the green moss, trying to cover as much of the wreath as possible and glue in place. I layered the floral pieces on the bottom of the wreath and glued in place. I added a pretty shamrock shaped sign and a few other shamrocks. Lastly I added an ornate white and gold ribbon to hang the wreath with. I absolutely love how it turned out and I know I couldn't of found something like this in a store for small amount that I spend. Take the time to make your own decorations, it cost effect and really fun! Plus it is always fun when someone ask where you bought and you can just smile and say I made it!
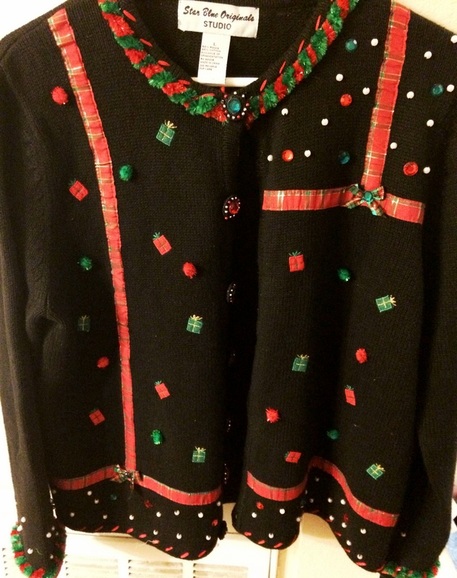
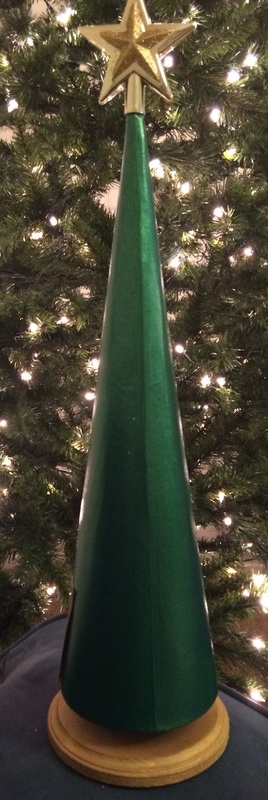
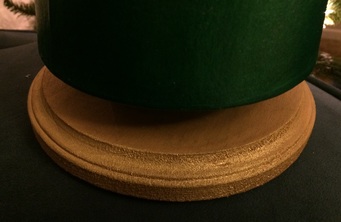
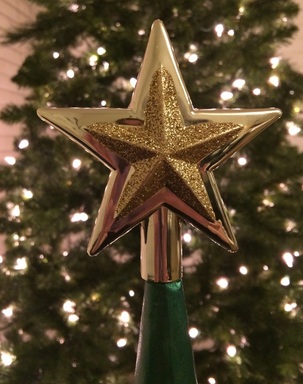
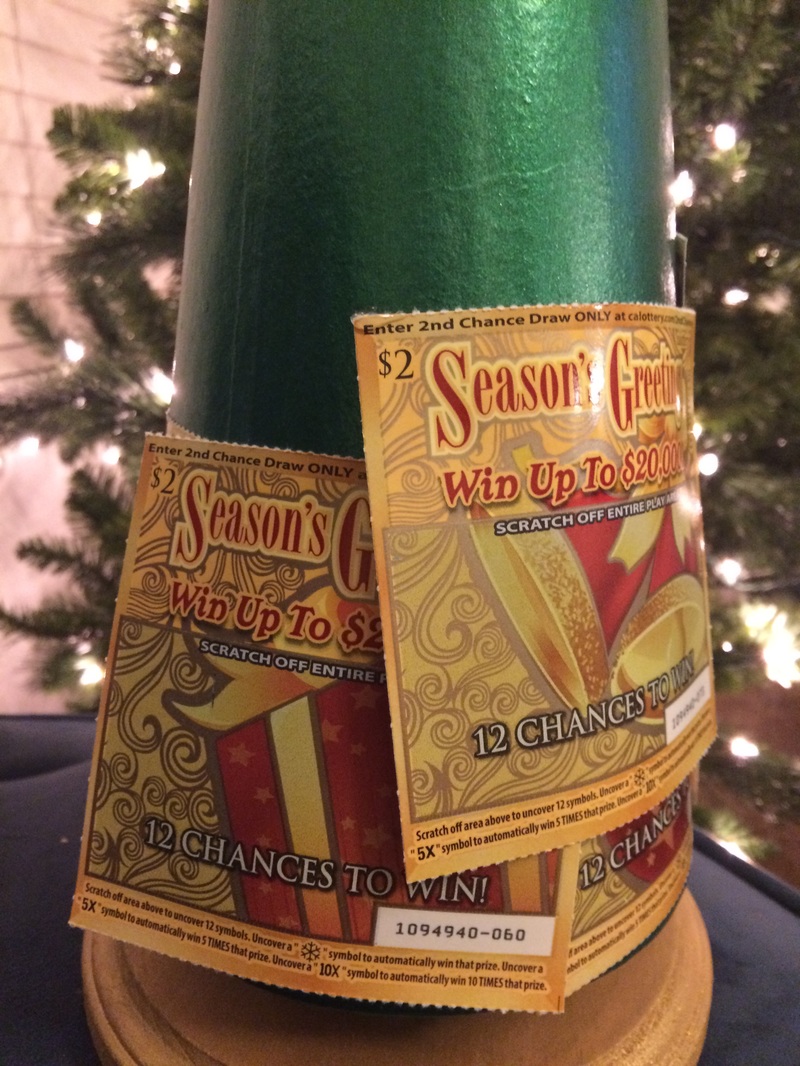
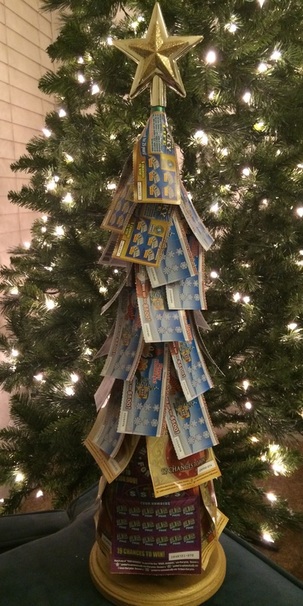
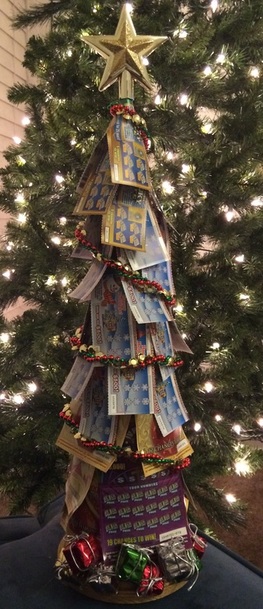
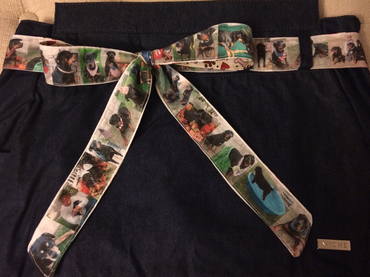 Christmas time is here and that means it’s time for Christmas gifts. I know when it comes to the perfect gift to my mom I just need to do something that involves her dogs! I decided to make her a special shash for her Prima Miche bag. I am a Miche representative and all of the ladies in my family carry these great bags so I have made my own sashes for certain shells. I picked 30 favorite pictures of all her dogs and printed them on fabric paper that I found at the local craft store. I simply created the print out in Word and made them about two inches height and closely next to each other. I cut the rows of pictures in small strips and sewed them all together to create a long ribbon. I then sewed on a cute dog print fabric to the other side of the picture ribbon. Lastly I ironed the sash and put it on a new Prima shell. I have no doubt that she is going to love her personalized gift. I hope you take the time to make a unique gift this Christmas for someone special. 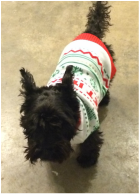 Duffey is all ready for the Ugly Sweater Party! Duffey is all ready for the Ugly Sweater Party! Every year Amber and I get together and watch the local Christmas parade. After the rough couple of weeks I have had, we decided to watch it from my house so we could work on our ugly sweaters for our up coming party. We found sweaters and our favorite thrift stores, but they just weren't ugly enough! I found a Santa pom pom kit at a craft store and put them together and glued them on Jack's sweater. For my sweater I added sparkly pom poms, fuzzy trim, jewels and plaid bows. Amber added pom pom, trim, and bows as well. Needless to say by the time the parade was over we had a couple of ugly sweaters to party in! Today was our Winter Warmer at work. Each division in the department was asked to submit a raffle basket to help raise funds for the next event, so we decided to make a Lottery Tree. Since I'm the crafty one of the group I got to put it together. It took a little maneuvering, but I think it turned out great and was a big hit at the luncheon!! I started with a craft store cardboard tree and painted it a metallic emerald green. Also at the craft store I found a round wooden base that I painted gold and a gold star to top it all off. Once the tree is glued to the base and the star glued to the top, start taping the largest lottery tickets to the bottom of the tree. Only tape the top of the tickets and if needed the sides so the bottom can curve out to look like branches. Moving up use the smaller tickets and spacing them accordingly. Once all the tickets have been taped in place decorate it with some garland and presents!
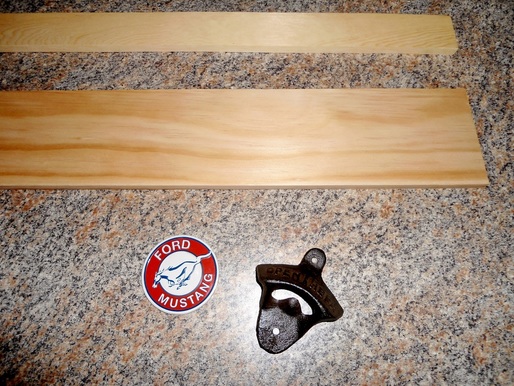
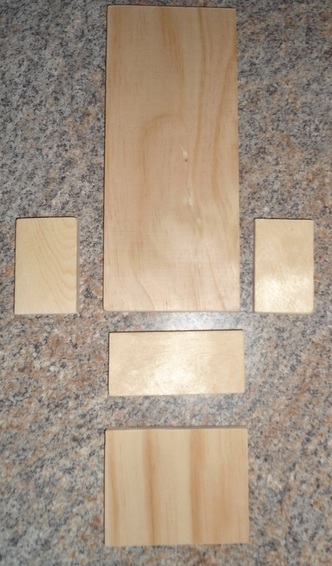
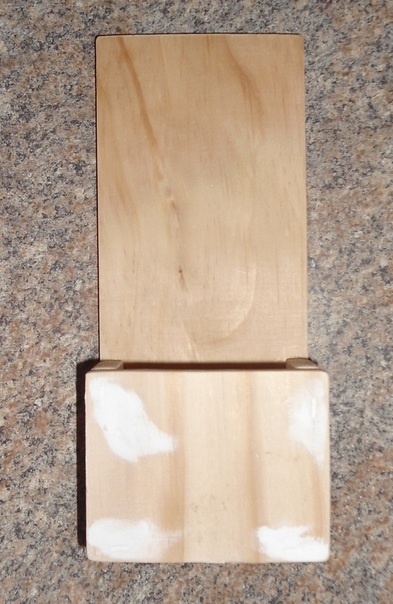
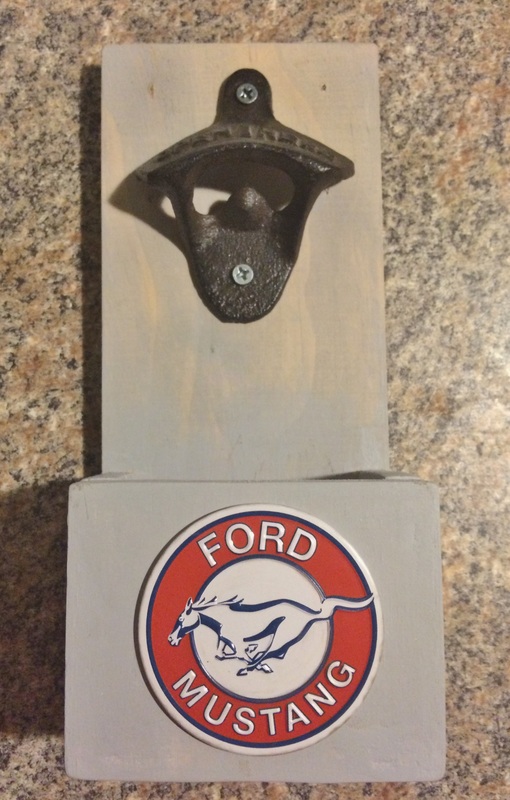
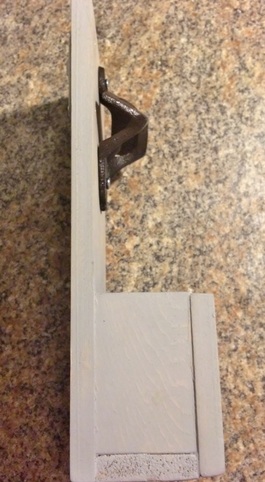
Today is Amber's husband's birthday and I wanted to try to make his gift this year. I thought I would stick to his two of his favorite things: Beer and Ford Mustangs. He has a love for hand crafted beers so I came up with a Mustang themed beer bottle opener. The final project turned out better than expected. Follow the steps below to make your own bottle opener. Materials 1 Piece of Wood 12 inches by 3 inches by 1/4 inch 1 Piece of Wood 18 inches by 1 inches by 1/4 inch Hand Saw, Jig Saw, or Chop Saw Staple Gun or Small Nails and a Hammer Wood Filler Sandpaper Metal Bottle Opener 2 Short Screws Metal Decal if desired Metal Glue if using a metal decal Paint or Stain if desired Foam Brush if painting or staining Cut the 4 inch width board into two length, the first into 6 inches and the other 2 inches. Cut the 2 inch width board into three lengths, the first two 1 3/4 inches and the other 3 inches. Staple the two side pieces (1 3/4 X 1 inch) to the bottom piece (3 X 1 inch). Staple the front piece (2 X 3 inches) to the three connected pieces. Staple the put together piece to the back piece (6 X 3 inches). Make sure the staples are flush with the wood and fill in the holes with the wood filler. Once the filler is dry, sand smooth and paint or stained if desired. I did a grey wash on Aaron's. Attach the metal decal, a magnet that I found out a craft store, with metal glue. Lastly screw in the bottle opener, also found at the craft store, with the small screws. That's it! Jack helped me out with cutting the boards and attaching the pieces together. We added a case of craft beer and a one of a kind, personalized gift!!!
|
From Me...These are posts from the original Oak Tree Junction blog before I took a break in 2020. These posts were created to share my creations with the hopes that it will inspire others to show their creative side. I plan to continue to share new creations on the current blog. Categories
All
|

